April 22nd, 2001
Been a while since I've updated. Mostly because I've been doing alot of one hour sessions. As happens with alot of these kind of projects, Real Life(tm) managed to interject and attempt to derail me from my plans of airplane building. Alas, I shall NOT be deterred!
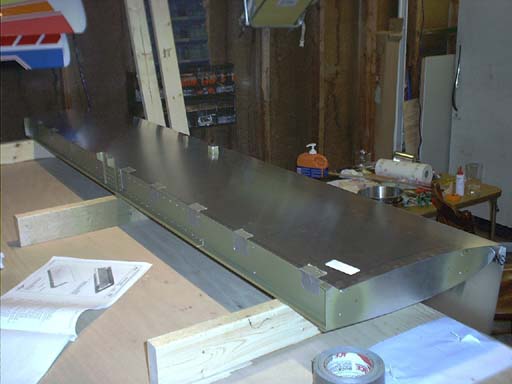
The work began in earnest with the stabilizer skins. First order of business was to cut the holes in the skin to clear the forward attach brackets. These poke uncerimoniously through the stabilizer skin and attach to the fusalage. Cutting this hole was no real big deal, but it was certainly one of those "one shot deal" kind of things. In order to cut these holes, you need to first find the centerline on the skin, then measure to find out where on the skin the spars will land. With that, you measure from either side of the centerline and mark to cut these holes. There's no real easy way to do this, and I must have measured this a dozen times just to be sure. The actual cutting is a leap of faith, since there's really no way to verify if it's right until you've cut a sufficient hole to clear the brackets. As it was, my distances were correct, but I got the angle of the bracket a touch wrong and had to grind away at the hole a bit to make it fit. Not very bad at all, and all of this work will be buried in the fuse anyway when it is assembled, so no big deal.
What IS a big deal is what I had feared in the first place. The spars are bowing in towards each other due to the ribs all being the same stamped size, but the final internal ribs are NOT sitting on spar doublers, making them effectively a few millimeters shorter. This is amplified at the end of the spar, Thus the skin does not lie even with the rear of the spar flange all the way across. Probably not hugely critical, but it's ugly, and might cause me to miss a hole or drill a hole out of tolerance, which will make it even MORE ugly. We shall see. Not a heck of alot I can do about it now.
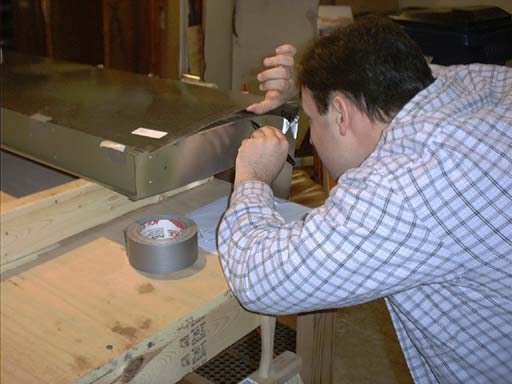
Alot of this skin work involves re-checking to make sure that measurements are correct. As it was, everything looked okay, except for one little thing. The center ribs need a pitch of 70mm between rivets, which is great. I can miss all of the flutes this way. The end ribs need a pitch of 35mm. This is NOT great, as it appears that the person making the end ribs didn't take this into consideration. If I were to measure an actual 35mm between rivets in the end rib, I will hit at least one flute, no matter how I slide the template around. I had to get creative with the measuring and try to not make it obvious that I'm trying to miss flutes. It seemed to work well, until I got to the tips of the end ribs. It appears my end ribs aren't quite square. Well, the one closest to you in the picture is, but when I mirrored the drilling pattern on the other side, I managed to get uncomfortably close to the edge on one hole, and managed to miss the rib completely on the last hole towards the tip. I'm not quite sure if I should sweat this or not, but I'm figuring that the skin will lie tight against the rib tip, so deformation shouldn't be a factor. I'll measure this today and see if pushing the rib in and drilling a hole is an option. Not a tragedy. The rear spar holes managed to propogate towards the bend radius on the spar flange, but they're all within tolerances, so no real biggie there.
Making the lines for the ribs was accomplished by using the rib template I had created to space the ribs on the spars. Once I marked out where the ribs were to fall on the skin, I used a large carpenters square to make straight lines from back to front, and measured out the rivets for a pitch of 70mm. These worked out perfectly. The holes were right in the middle of the rib flanges. The front spar worked out well also.
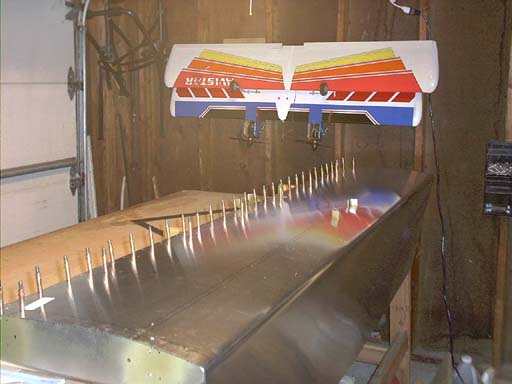
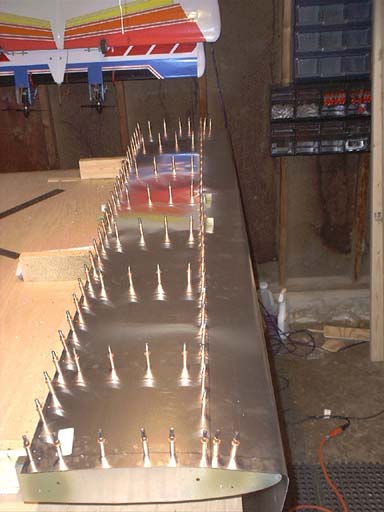
To keep the skin from bowing between the holes, I clecoed every other hole while drilling. This resulted in a nice tight skin on the stabilizer.
Now that I have it all together, I get to take it all apart to deburr and prime. I hope to get to that tomorrow.