
April 13th, 2001
It's Friday the 13th. Good thing I'm not superstitious, as it's a good full day to build stuff.
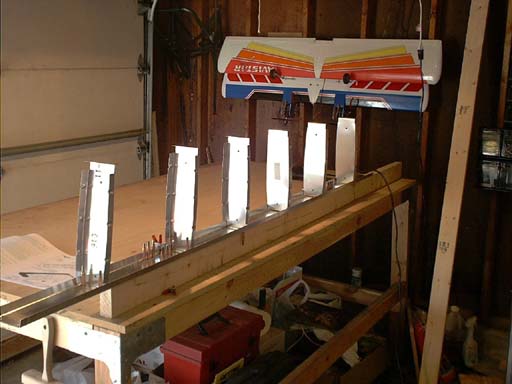
Today we start into one of those portions of the build that actually seems like it's moving quickly. It's also a scary time, since we're now aligning the ribs and drilling them into place. I'm sure I'm making this much more complicated then I should, but at least this is a learning experience, and that's what Homebuilt Aircraft are all about.
Of course, after much care in measuring, aligning, etc. I managed to drill and cleco the first rib backwards and 180 degrees out. Figures. Luckily, this lapse in thought didn't cost me a part. I just simply turned it around and drilled it out.. When I went to put this rib through the rear spar, I simply drilled them from inside through the existing holes. No biggie, but certainly stupid.
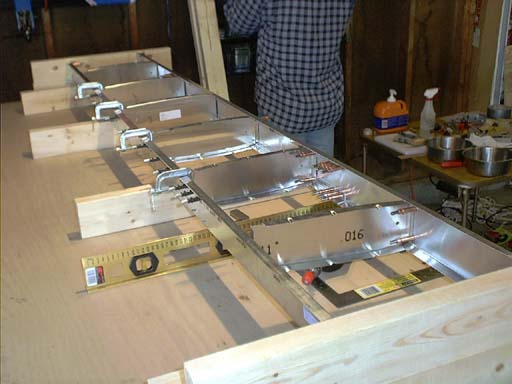
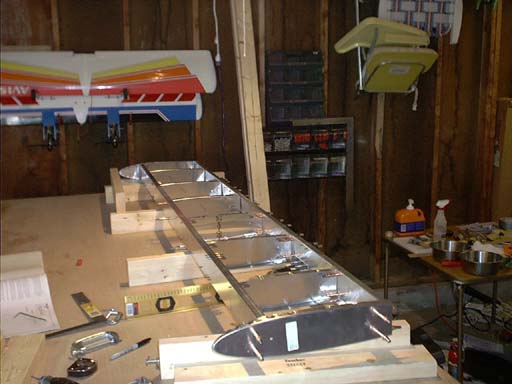
Once I attached the ribs to the front spar, I aligned the rear spar up with a square and clamped the ribs to the rear spar. The directions wanted me to remove the ribs and drill them to the rear spar using the rib spacing template I created some time ago (I neglected to show a picture of it... It's a strip of cardboard with the rib stations lined out on it... very econo-engineered, but effective). I thought about this, but figured the better tactic would be to do it this way to ensure that everything was square (and I don't want to trust measurements if there is some other way of confirming them).
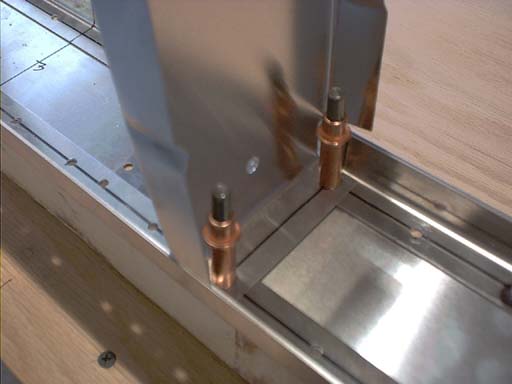
Once the rear spar is clecoed to the ribs, we needed to fashion some end "L" brackets to connect the end rib to the front and rear spar. Zenith gave me about 12 feet of L extrusion to play with for this purpose, so I cut these angles with snips to fit inside the end ribs. Then I drilled and clecoed these to the forward side of the spar ends, such that the sides would be flush with the inside of the end ribs when they were on. With that done, I then attached the end ribs, drilled and clecoed them in place.
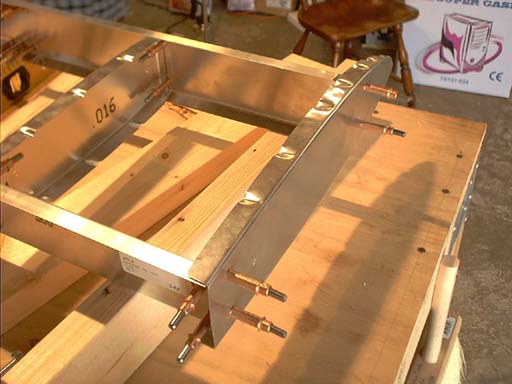
Once this was done, we triple checked to make sure that everything was squared up and that everything was connected correctly.
At this point it was time to dis-assemble everything, deburr the holes, clean, prime and reassemble to rivet. It was late though, and we would have needed to charge up the compressor and prepare alot of stuff, so I'll tackle all of this tomorrow.